Showing posts with label beef. Show all posts

Wednesday, May 16, 2012

A Yummy Taco Pizza Recipe!

Okay, ladies and gents--I think I've found a great way to use up your leftover taco meat! 

For all of you who are from a small town, you probably remember the Taco Pizza from Pizza Hut.  What is there NOT to love about that pizza?!  When I was in college, I would order a large thin-crust and have it for breakfast throughout the week.  Looking back, it probably wasn't the healthiest way to start the day, but it was totally worth it :-)  By the way, did you know that you can't find the Taco Pizza on their online ordering site???  You have to order your pizza the old-school way, by picking up the phone and calling them!  Gasp!


To this day, I still love their Taco Pizza...but, with having to cut wheat out of my diet, that means I can no longer order it (insert sad face here).  As a result, I've been playing around with various ingredients and I have finally found a recipe that will give Pizza Hut a run for their money!  It's super easy to make and you can use either a regular pizza crust or a gluten-free pizza crust.

So, if you're in the mood for a Taco pizza fresh from your own oven, this is what you need:

Taddy-Long-Leg's Taco Pizza
1 Pizza Crust (I prefer a thin crust)
Refried Beans (I used fat-free with great success)
1/2 lb. taco meat
Canned enchilada sauce (this is the "secret" ingredient--don't skip it!)
Shredded lettuce
Shredded cheddar cheese
Sliced green onions

Spread a thin layer of refried beans over your pizza crust--add taco meat.  Drizzle enchilada sauce over the bean and meat mixture (make sure you shake the can well before opening it).  Top with shredded lettuce, cheddar cheese and sliced green onions.  Bake according to directions on pizza crust packaging.  Then, enjoy!

Thursday, May 3, 2012

A Twist on Traditional Meatballs--Mongolian Style


Several weeks ago, I received an email from one of the many listserves that I am subscribed to.  Usually, I don't even open the email (Hey, give me a break--I'm no longer involved in the group!) and it goes directly to my trash folder.  For what ever crazy reason, that day I decided to open the email and I'm glad I did!

The gal mentioned she would be bringing Mongolian Meatballs to the meeting.  My first reaction was, "What the heck are Mongolian Meatballs?!"  Naturally, I went on Pinterest and much to my surprise, I didn't find anything :-(  If it wasn't on Pinterest, did Mongolian Meatballs really exist?!  I was starting to panic.

I did the next best thing that any smart person would do.  I googled "Mongolian Meatballs" and again, I was surprised by the results.  But this time around, I was pleasantly surprised.  Google actually found BUNCHES of recipes!  I read through a few and there were huge variations.  One recipe called for a mixture of ground meats--beef, lamb, pork--and super exotic spices plus all-day-long cooking methods...others called for 1 type of ground meat, an egg and a pressure cooker.  The anxiety really started to set-in.

Eventually, I found one that seemed to be my middle-of-the-road recipe.  It called for simple ingredients and didn't require too much of my time.  Plus, the blogger is a professional chef turned Stay-At-Home-Mom.  If I have learned anything in my life, SAHM's are generally amazing cooks.  And combine that with a SAHM who is a chef?!  I knew this recipe had to be good.

I finally got around to trying the recipe the other night.  As I put everything together, I started to have some serious doubts.  Especially, with the bottled hoison sauce.  There's rarely a time that I use the bottled stuff and I actually end up liking the recipe :-/  I'm not sure what it is, but the flavor always seems very far from authentic.

Anyhow, I was too far into the recipe to call it quits.  I put the meatballs in the oven, prepped the vegetables, started the rice and hoped for the best.  If it turned into an epic fail, it wouldn't be the first time we had placed a delivery order after trying a new recipe!

Finally, everything was ready and we plated up the food.  I took one bite and was quite amazed!  The meatballs were actually good.  And not just good.  But delicous!

I decided to let the husband try a few bites before I would ask "Well, whatdya think?"  But before I even had a chance to ask, he said, "Wow!  What are these meatballs?  They're really good.  Can we have them again?"

Well, that was a huge change from his usual, "Oh--they're fine" response!  This recipe will definitely have a home in our "For Keeps" file.  If you're up for trying an easy and delicious variation on your typical meatballs, give this recipe a try!  The original recipe can be found at http://sahmchef.blogspot.com/2011/07/mongolian-beef-meatballs.html; I made only a few minor changes and "my" version is below.  Enjoy!

Image courtesy of The Stay-at-Home-Mom Chef

Image courtesy of The Stay-at-Home-Mom Chef

Mongolian Beef Meatballs
Yield: 4 to 6, depending on who you're feeding--or 2, if it's J-Money and me:)

Ingredients:
1/2 C hoisin sauce
1/4 C soy sauce
1/4 C brown sugar
1 t garlic powder
1/2 t ground ginger
1/4 to 1/2 t red pepper flakes (adjust the heat to your taste)
1 egg
1/2 C plain bread crumbs (I used crushed corn flakes)
1 pound ground beef
2 bunches green onions, sliced on the bias into 1 inch pieces
1 C matchstick cut carrots
vegetable oil

In a mixing bowl, combine the hoisin, soy sauce, brown sugar, garlic powder ground ginger, and red pepper flakes. You should have 1 liquid cup. Remove all but 1/4 C from the bowl and set aside.

Whisk 1 egg into the sauce in the mixing bowl, then add the ground beef and bread crumbs. Combine with your hands as you would a meatloaf or other meatball, then shape into ping pong ball sized meatballs. You should get 24 (we made our's larger and had about 14)
Bake in a preheated 250 degree oven on a parchment lined baking sheet (or broiler pan) for about 20 minutes until done. Because mine were on the larger side, I baked them for about 20-25 minutes at 350 degrees.
In a large skillet, heat one turn of the pan of vegetable oil to rippling hot. Add the carrots and cook 1 minute. Add the green onions and cook 30 seconds. Add the meatballs and reserve 3/4 C sauce, toss to combine, and cook for 1 minute more, until hot. Serve immediately with cooked rice.

Wednesday, April 18, 2012

Smokin' the Day Away...

Justin's birthday is less than 2 months away and I'm never one to give presents early...well, maybe 1 day early but that's IT!  And it's usually because I'm too excited about giving the gift and I'm about ready to spill the beans...but this year, I set a new personal record.  I gave him his birthday gift two months--yes, MONTHS--early!

We spent this past New Year's in Kansas City celebrating with Justin's college roommates.  Jabin, our host and son of a grocer, works in the milling industry and knows his food inside and out...And yes, there are days I secretly wish some of Jabin's tricks of the trade would have worn off on Justin when they lived together.  For example, when the guys came to stay with us back in October, Jabin took over the kitchen and had a HUGE breakfast whipped up--and cleaned up--in no time.  Like I said, why didn't that rub off on my husband?!

Anyhow, back to the story.  On New Year's Eve, Jabin introduced my husband to his smoker.  He had received the smoker as a gift from his parents and this thing was a gift from God...it was an electronic smoker AND had a digital thermostat!  All you had to do was load up the wood chips, throw in a pan of water (IF you wanted, it wasn't necessary), put the meat inside, shut the door, plug the baby in and set the temperature.  It was that easy!

The husband and I were never into smoking.  We bought a large Brinkmann grill several years ago and it has a smoker box on the end--but that just seemed like too much work....  In fact, back when the guys came to visit in October, we were sitting around the firepit when Jabin asked my husband, "What have you been smoking lately?"  We all sat there and our jaws just fell to the ground...and then I asked, "What the hell do you mean by that?!"  Turns out, Jabin had spied our grill/smoker box and was referencing THAT.  Not wacky tobacky....but we all got a good laugh out of that!

After we returned home from Kansas City, bellies full of smoked chicken wings, Justin decided he wanted a smoker just like Jabin's.  We priced them and they were actually fairly affordable.  Being the middle of winter, I decided I would buy him one for his birthday in June and it would be a HUGE surprise!  Because, really, would he even remember wanting a smoker for that long???

I was wrong.  For the past three months, my husband has been asking about the smoker.  Finally, I agreed to go to our local Ace Hardware just to "look" at one.  We got to the store, only to find out the company is discontinuing them--and as a result, Ace couldn't even order a floor model for us to look at!  We went to Home Depot--they didn't have any.  We went to Tru Value--they couldn't access the smoker, either.

So, what does a good wife do? I went on Amazon (duh!) and found an incredible deal on one.  Knowing the smoker wouldn't be around for much longer, I ordered it and told J-Money that his birthday gift was on its way!

If this isn't proof that my husband was a wee-bit excited about the smoker, I don't know what is...they had cut down a hickory tree at work, so they chipped it up and brought home 7 gallons of chips!  That's enough to last us, well, forever.

Anywho, the smoker arrived about two weeks ago and we've already fired it up a few times.  I have to admit, I kinda like the thing!  In a way, it's very much like a slow cooker--throw your food in, leave it all day and you come home to an incredible meal.  In fact, I think it will definitely replace our slow cooker during the Spring and Summer months!

The first weekend, we smoked some chicken quarters that we had in the freezer...we had no idea what we were doing and looking back, I feel bad for Jabin.  Little did he know that we would be calling him every 5-minutes about how to do this, how to do that...thankfully, he was a good sport and got us through the basics.

Because we were smoking chicken, we needed a brine to keep the meat from drying out--we eventually figured out a recipe for the brine and  and got the chips soaking in beer.  After 3 hours in the smoker, this is what we had!


After plating up my food, I took one bite of chicken and couldn't help but laugh!  Justin gave me a puzzled look but once he tried the chicken himself, he totally understood.  I couldn't believe we were responsible for such delicious chicken!  I was frankly surprised that we didn't kill the whole tray of chicken between the two of us, but it sure made for good left-overs :-)

That was two weekends ago.

This past weekend, we tried smoking a pork loin.  Again, we had some pork in the freezer (I promise I'm not a food hoarder!) that we defrosted and rubbed.  I had no idea how to smoke pork, so this time I went online for some information.  Luckily, I found a super awesome website full of tips and recipes.  We had struck gold!

We ultimately decided on a Memphis dry rub and a Western Carolina mop sauce.  They weren't identified as "matches" on the website and the dry rub was for pork butt (not a loin, like we had), but based on the ingredient list, I figured they'd go well together!

Much to my surprise, I was actually correct for once!  5 hours later, we took the pork out of the smoker, pulled the meat and warmed up the mop sauce.  Justin thought he had died and gone to heaven!  I can't even imagine what the mop sauce would be like drizzled over a pile of good ol' pulled pork!


For sides, I made fried cabbage and gluten-free Cheesy Garlic biscuits.  The fried cabbage was a new--and super easy--two ingredient recipe. Cabbage and bacon.  Anything with bacon is a guaranteed hit, right?! The directions said to serve it hot, so I did...but once it cooled off, I liked it even better.  Next time around, I'll just have to remember to make it early enough to chill it in the fridge for a while!  As far as the biscuits were concerned, I used the gluten-free Bisquick mix.  J-Money was CONVINCED they were something quite special--or, "off the chain" as he so Southern-ly put it.  I'm still not sure why he thought they were so great...???  Maybe he was just trying to suck up?!  Who knows!  But one thing that I thought was funny--he had no clue they were gluten-free!  I love tricking my husband :-)

So, what's on the menu for this weekend?  Smoked brisket!  I bought one at Sam's yesterday and I got the smallest piece available--it weighed in at 14 pounds!  That's a ton of meat!  But, the husband was excited--he will be eating on smoked brisket for several meals...and that excites ME--I won't have to do any cooking for a while!

Wednesday, March 21, 2012

A Super Easy--and yummy--Philly Cheese Steak Sandwich!

I have to admit it--I love Pinterest!

My pre-Pinterest existence kinda reminds me of what life was like before the advent of the World Wide Web--we lived life and were oblivious to all the potentially excellent resources that existed elsewhere in our world.  Because, frankly, we just didn't know any different.

Not only do we now have the Internet at our fingertips, we can connect with sites we have never heard of thanks to Pinterest!  And it always amazes me how one site's single posting can go viral and half the world is on a Cinnamon Roll Cake/Spray Painted Bottles/Fitness Routine kick...

For me, my favorite part of Pinterest is becoming introduced to new resources...and so far, it has been worth the time that quickly slips away when you're on Pinterest.

Case-in-point, I was reviewing a friend's pin because 1--I wanted to see if the pin actually linked to the information (it drives me nuts when I see something very useful but the link is dead, so I refuse to repin) and 2--it claimed the pin was from a site I had never heard of.  So, of course, I was naturally curious!

And boy, am I glad I clicked on that pin!  I can't even remember what the original pin was for, but in browsing the site, I found a super easy AND yummy recipe for Philly Cheese Steaks.

I love, love, love Philly Cheese Steaks.  As I child, I used to request them for my birthday dinner and I remember my mom tediously slicing up all the steak.  In my adult years, I have really come to appreciate my mother's willingness to do that!

If you're a Philly Cheese Steak person--or you just want a quick meal that everyone will like, you have to try this recipe.  The original creator calls them "sloppy-joe" style Cheese Steaks and I know it's because of the ground beef that she uses...but don't let that deter you!  If anything, you'll save a few extra bucks buying ground beef instead of steak :-)

Photo Courtesy of Chef In Training
PHILLY CHEESESTEAK SLOPPY JOES
Recipe adapted from Chef In Training, original source 'A Taste of Home Cooking'

1 lb. ground beef
1 softball-sized onion, chopped
1 green pepper, chopped
2 T. A-1 steak sauce (we used a little more for extra kick)
1 C. beef stock
Salt and ground black pepper
4 dinner rolls
1 T. butter
1 T. flour
1 C. milk
1 C. provolone, shredded

In large skillet over medium-high heat, brown the ground beef (about 5-6 minutes). Add the onion and green pepper and cook another 3-4 minutes, until the vegetables start to get tender. Stir in the steak sauce and beef stock, season with salt and pepper, bring up to a bubble and cook about 2 minutes.

Split open rolls and remove most of the soft insides, leaving a bed to hold the meat mixture. Toast the rolls and set aside.

While the meat is cooking, melt the butter in a medium-size pot over medium-high heat. Stir in the flour and cook about 1 minute. Whisk in milk, bring up to a bubble and let thicken, about 2 minutes. Turn off heat and stir the cheese.  We skipped this step--I just melted a bit of Velveeta with a splash of milk and not only did it save time, it complimented the meat mixture very well.

To serve, place a scoopful of the meat mixture onto the bottom of the rolls, then top with the cheese sauce and replace the top of the roll.

Sunday, January 15, 2012

Recipe of the Week: Sweet 'N Tangy Meatballs

Are you ready for another delicious recipe that I just discovered?!

I probably shouldn't admit that I just came across the recipe because based on my internet research, it's been around forever.  However, I will admit that I was both curious AND concerned about the recipe.  The recipe only called for 3 ingredients, a slow cooker and almost seemed too easy to be true.

Anyhow, we had a potluck dinner after Church today and I needed something quick and easy to take.  Throughout the week, I thought about making some other dishes that go over well at potlucks but I kept coming back to this recipe.  Almost always, the mention of a slow cooker seals the deal for me!

As we were loading up the crockpot of Sweet 'N Tangy Meatballs into the car this morning, I confided in Justin my worries about serving a recipe that I have never prepared to a bunch of people.  Knowing my luck, the meatballs would turn out to be an epic fail and everyone would see my leaving with my nasty potluck dish!

Thankfully, I was dead wrong.  We came home with an empty crock-pot!  I saw several people go back for more and they had already disappeared.  Being the "helper" that I am, I divulged the recipe--they couldn't believe how easy the meatballs were!  Especially since they were quickly kid-approved by all the young tikes.


The recipe called for 3 very basic ingredients:


All you do is dump a big bag of frozen meatballs in the slow cooker and pour in a 12-oz bottle of grape jelly and a 10-oz bottle of chili sauce.  Cook everything on low for several hours and you're ready to go.  It's really THAT easy!

After reading some reviews,  I decided to play with the recipe a bit.  I added 1 teaspoon of Worchestershire sauce and 1 teaspoon of ground mustard to everything.  I also cooked the meatballs on high for about 1 hour and then turned it down to low until it was time to eat.  By then, the jelly and chili sauce had penetrated the meatballs and they had tons of flavor!  Surprisingly, they weren't really sweet.  So I don't know why the recipe called them Sweet 'N Tangy--if it were up to me, I would call them "Don't-Count-On-Any-Leftovers People Pleasers."

I also read some reviews where they substituted Apricot preserves for the grape jelly--I can't wait to try that version, sometime!  Some people also used an Asian Chili sauce to give it more kick--again, I can't wait to try that as well!  To make a meal out of the meatballs, many people reported serving them over rice. 

Whatever you end up doing, just make sure you decide to try these People Pleasers--you (and all the other mouths) won't be disappointed!

Friday, December 30, 2011

Recipe of The Week: Michael Symon's 4-Meat Lasagna

Last week while I was waiting on the Sears guy to show up, some TV show called The Chew came on while I was cleaning house.  I had never seen it before but since it has Clinton Kelley from TLC's What Not to Wear I decided to stay tuned.  I have always wanted to go on What Not To Wear!  Sure, it might be a bit embarassing but I could put the $5,000 Visa card to good use and I'm sure I could pick up a few new tips :-)

Anyhow, I'm glad I stayed tuned.  One of the other co-hosts is Michael Symon...he happens to be one of Food Network's Iron Chefs.  He was making a lasagna that his mom makes every Christmas.  Of course, it looked super easy...but that's how all made-on-tv-screen foods are!  Because the ingredient list had a particularly intriguing ingredient, I decided we would try his Mom's lasagna.

His "secret" ingredient is neckbones.  Yes, neckbones.  You could not pay me enough to eat a neckbone...or a hamhock...or anything of the sorts.  But I do know they lend great flavor to dishes and Justin is Southern enough that he'll eat the h-e-double hockey sticks out of neckbones!  The only reason I considered the recipe is because you REMOVE the neckbones once the sauce is finished simmering :-)


If your house likes lasagna, you have to try this!  As it uses 4 different meats, be prepared for an increase in your grocery bill.  And make sure you have plenty of time set aside to be in your kitchen--the meat simmers for 2 hours and then you bake everything for another hour!  But hey, it's worth it.  Justin is a self-proclaimed food critic and declared this lasagna as earning a 10-out-of-10! 

Image Courtesy of The Chew

Michael Symon's Mom's Lasagna
½ cup olive oil
1 onion
4 garlic cloves (minced)
Kosher salt
1 pound pork neck bones
1 pound veal
1 pound beef
1 pound spicy Italian sausage (loose or removed from the casing)
½ cup dry white wine
4 cups chopped peeled tomatoes or 1 - 28 ounce can San Marzano tomatoes with their juice (we used the canned tomatoes)
3 bay leaves
1 pound dried lasagna noodles (Michael advised against using non-boil noodles)
2 pounds whole-milk ricotta cheese
¼ cup chopped fresh flat leaf parsley leaves
¼ cup chopped fresh basil leaves
¼ cup fresh oregano leaves
2 large eggs
1 pound fresh mozzarella cheese (grated)
½ cup grated parmesan cheese

Instructions:
1.  In a large Dutch oven or heavy pot, heat olive oil over medium heat. Add the onion, garlic, and a three-finger pinch of salt and sweat them until they are translucent about 2 minutes. Add the neck bones and brown them, about 5 minutes.
2.  Add the ground veal, beef and sausage, season with another healthy pinch of salt, and continue cooking until the meat is browned, about 10 minutes. Add the white wine, tomatoes and their juice and the bay leaves, scraping the bottom of the pot with a wooden spoon, making sure to get all of the browned bits into the sauce.
3.  Season the sauce with salt and simmer for 2 hours over medium heat (you may want to lower the heat if the sauce is dissipating too quickly). Remove the bay leaves and neck bones and let cool--make SURE you thoroughly check the meat for the itty-bitty pieces of bone that will fall off the large neckbones. Skim any fat that rises to the surface.
4.  Bring a large pot of water to a boil. Add enough salt so tha it tastes seasoned and allow the water to return to a boil. Add the noodles and cook until al dente. Drain well and set aside.
5.  Meanwhile, in a medium bowl mix together the ricotta, parsley, basil, oregano and eggs with a pinch of salt. Preheat the oven to 350 degrees F.
6.  In a lasagna pan-9 x 13 inches is optimal – ladle about 1 cup of sauce on the bottom. Arrange a layer of noodles on this followed by a layer of sauce and then some ricotta mixture, smoothing it with a spatula to the edges. Repeat the process until the pan is full. Finish with a final layer of noodles, sauce, mozzarella cheese and Parmesan cheese.
7.  Cover the lasagna with aluminum foil and bake for 1 hour. Uncover and bake for 30 minutes. Let cool before cutting and serving.

Friday, July 1, 2011

Some Tacos for All That 'Slaw

Remember the coleslaw recipes I shared earlier this week? 

If you read far enough down http://taddylonglegs.blogspot.com/2011/06/coleslaw-crazy.html to find that I mentioned the slaws were the perfect topping for tacos, you're my newest favorite person ;-)

And I don't mean just any "regular" tacos, either.

One of my go-to staples has always been seasoned taco meat for tacos, burritos, Mexican lasagna, whatever it was we had on hand that would constitute a meal.

Fast-forward and Justin and I can no longer handle seasoned taco meat.  If he wants his stomach to get upset and my GERD to get out of control, it will definately make that happen!

As a result, we have become Taco Snobs. 

We're so done with that straight-out-of-an-envelope seasoned meat junk.  And my god, no boxed taco shells purchased from the grocery store either!

The trick to a good taco--wait, nearly amazing taco--is this:


A good old corn tortilla.  Fried in some hot oil!!!  A flour tortilla would be good, too, but there's just something about a fresh corn tortilla (we prefer the white corn variety) that can't be beat.

Make sure you don't fry your tortilla too long--you want to be able to fold it in half.

Once it's out of the oil, it's time to stuff it!

If you made the Spicy Taco Slaw, the best taco filling is:


Oh, yeah--that's right...Good, old processed Cheez Whiz!  I saw the combination over at http://life-as-a-lofthouse.blogspot.com/ and was slightly curious so we had to try it.  While your tortilla is still hot, spread a little Cheez Whiz on the inside, top with your ground beef and onion mixture and our personal touch, the Spicy Slaw.  You'll be in taco heaven.

When we made our Mexican Coleslaw, we had chicken tacos with it...once again, it's easy peasy.  All it requires is:


Dump it all in your crock and cook until the chicken easily shreds.  Fry up your tortilla, stuff with some chicken and Mexi Slaw...but to really set it off, add a spoonful of fresh salsa.  None of that jarred junk--skip it, it will RUIN the yummy-ness!


Trust me--make sure you add some corn tortillas to your shopping list next week and give the tacos a try.  The old boxed shells and enveloped seasonings are likely to go out the window! 

Monday, June 20, 2011

Super Easy Chile Verde

As the school year was winding down, I promised Justin I would put the slow cooker away for the summer. 

Truth be told, we busted it out again last week. 

We were both craving Chile Verde.  Justin had a softball game Tuesday night and I had a ton of stuff to do around the house that was going to take an entire day so honestly, there wasn't much time for a home-cooked meal.

I found this recipe this past winter at http://www.crockpot365.blogspot.com/.  The blogger had a recipe for homemade salsa verde but considering tomatillos can run around $18.99/lb, I skipped the recipe for homemade verde and was thrilled when she offered a much more simple version.

It's as easy as this...


A person can serve Chile Verde in a variety of ways, but our favorite way is just pouring some chile verde over steamed rice and having tortillas on the side.  It's a great meal for those days where you don't feel like eating any vegetables ;-)

Chile Verde traditionally uses pork meat...however, we most always use a beef roast of some kind and it's delicious (and a bit greasy but that definately contributes to the flavor as well).  For the best flavor, use only half the salsa during the cooktime and add the last 1/2 right before serving.

This has honestly become one of our most favorite meals...and it makes great left overs, too!

Thursday, May 5, 2011

Happy Cinco de Mayo!

Happy Cinco de Mayo!!!  The past 10 days have been a whirlwind of hoopla and honestly, a big ol' fishbowl margarita sounds incredibly yummy right now.  Something tells me that would lead to nothing but a nasty hangover AND guess what, things won't slow down until next week so I really don't have the time to doctor a headache and queasy stomach!  lol.

Aside from thinking about margaritas on Cinco de Mayo, I always associate the festive day with Mexican food as well.  Very orginal, right? ;-)

I love Mexican food.  Love it.  I could eat it most every day and not get tired of it.  Justin, however, is only willing to eat it every so often so I have had to find ways around that.

I make a dish that he doesn't really consider Mexican.  I wouldn't either...but it's good enough that people have asked for the recipe over the years!

I have found that my Mexican Lasagna is a great dish to make when serving numerous people.  It's inexpensive--a lot of times we have most of the ingredients somewhere in the pantry or fridge--and can easily be doubled or tripled by using a 9x13 baking dish.  I'm signing off for now, so hope you have a great Cinco de Mayo!

Mexican Lasagna
1 lb. ground beef
chopped onion
1 envelope taco seasoning
1 can chili beans in sauce, undrained
3/4 C. salsa or can of Rotel, drained
Flour Tortillas
Sour Cream
Shredded Cheddar Cheese

Brown ground beef and however much onion you like.  Drain off grease and add taco seasoning + however much water is called for on envelope.  Add chili beans and salsa/Rotel; simmer over low until thickened.  Place tortilla in bottom of greased round casserole dish.  Top with 1/3 of meat mixture, drop a few spoonfulls of sour cream on the mixtures and sprinkle with cheese--be careful not to stir in the sour cream as it makes the dish super runny.  Top with another tortilla followed by the meat/sour cream/cheese and if you have enough meat left, do a 3rd layer.  Cover casserole dish and bake in a hot oven until bubbly.  Let cool for 5-10 minutes so the casserole can set up some.

Sunday, January 16, 2011

Killing Two Birds With One (Chipotle) Stone

For 2011 Justin and I are trying to really improve our saving habits...in the past few months we worked really hard to see where we could cut corners or what monthly expenses we could reduce.  Just bundling our TV/Internet and setting up a multiple-car insurance deal made a significant difference.

But then there are some things you just can't really touch and that's where our food budget falls.  As I've mentioned before, having a giant husband who works a manual labor job requires that we prepare hearty meals and have plenty of snacks on hand.  However, to reduce costs and wasted food I make a conscious effort to use the same ingredient in multiple ways throughout the week...Poor Justin gets tired of having things such as brocolli and rice on a Monday and brocolli in a stirfry by the week's end but we are definately wasting less food (and money) this way!

Several weeks ago I was successful in using one ingredient in two dishes without Justin even noticing...or complaining.  Hail, the almighty Chipotle pepper in Adobo sauce!!!  The first dish was a Southwest Shepherd's Pie (not even spicy) and the other one was supposed to be a meat filling for burritos.  However, it turned out super saucy--and hot--so we put it over rice and it was delicious!

If you have some extra chipotle peppers in adobo sauce or want to experiment with them, here are the recipes:

Southwestern Shepherd's Pie
*this recipe yields enough for two casseroles--we ate one and froze the other
3 lb. ground beef
1 C. chopped onion
2 cans (10oz. each) enchilada sauce
2 T. flour
2 t. chopped chipotle peppers in adobo sauce
1 t. cumin
1 t. oregano
2.5 C. milk
1/3 C. butter, cubed
1 t. salt
4 C. mashed potato flakes
2 cans (4oz each) chopped green chilies, undrained
2 C. shredded Mexican cheese, undivided
2 cans Mexicorn, drained
2/3 C. chopped green onion

In a Dutch oven, cook beef and onion until meat is no longer pink; drain.  Add enchilada sauce, flour, chipotle peppers, cumin and oregano; bring to a boil.  Reduce heat; simmer uncovnered for 5 minutes.  Meanwhile, in a large saucepan, combine water milk, butter and salt; bring to a boil.  Remove from heat and stir in potato flakes until combined.  Add chilies and 1/2 C. cheese.  Transfer meat mizture to two greased 11x7 baking dishes.  Layer with corn, mashed potato mixture and remaining cheese.  Sprinkle with green onion; cover and freeze one casserole for up to 3 months.  Cover and bake the remaining casserole at 375* for 20 minutes.  Uncover and back 5-10 minutes longer or until bubbly.


Chipotle Beef and Rice
1.5 lbs beef round steak, cut 3/4" thick (we used stew meat)
1 can (14.5 oz) diced tomatoes, undrained
1 small chopped onion
1-2 chipotle peppers in adobo sauce, chopped (we used 1/2 a can and didn't even bother with chopping)
1 t. oregano
1/4 t. cumin
1 clove garlic, minced

Place meat in a slow cooker and top with undrained tomatoes, onion, chipotle pepper, oregano, cumin and garlic.  Cover and cook on low for 8-10 hours or on high for 4-5 hours.  Serve over rice.  Drawing on inspiration from mole sauce, I added a large Ghiradellhi chocolate kiss at the very end--it really brought out the smokey chipotle flavor without adding any bit of chocolate-y sweetness.

Friday, December 3, 2010

An Epic Fail

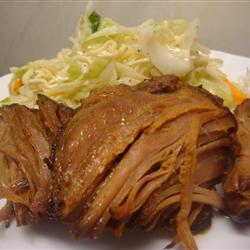
While making my grocery list earlier this week, I came across a recipe for slow cooked Asian Shredded Beef.  Per the reviews, it pretty much sounded like bulgogi--since making bulgogi can be time consuming I was excited to find a recipe that did all the work and guaranteed a tender piece of meat.

I threw all the ingredients in the crockpot this morning and when I came home from work, the house smelled delicious.  As I was walking in the Mayor's Holiday Parade, Justin started the rice and supper was ready when I got home.  I was so excited to try the bulgogi!

The recipe was an epic failure.  Salty doesn't even begin to describe the sodium content.  Don't get me wrong--I love salt and generally think things are on the bland side...after all, I would be thrilled if someone gave me a salt block!  But holy cow--I couldn't even eat the meat because it was so salty.  The flavor was good, but something tells me the soy sauce/ketchup/hoison sauce combination was a bit much!  In the future--if I'm ever brave enough--I may try it with reduced sodium soy sauce and a tomato paste v. ketchup.

And I think part of the problem was an Asian rib recipe we tried over Halloween weekend...I keep thinking about it and comparing other meat dishes to it!  I had just seen it on Allrecipes.com and as it turned out, Hy-Vee had the short ribs deeply discounted that particular week...so I just had to try it!

I skipped the whole marinating part and the meat still soaked up tons of flavor....only suggestion: cut back on the amount of sesame oil and olive oil.  I realize oil plays a huge role in marinating meat but the ribs produced enough grease on their own...and the additional 6 Tablesppons of oil was ridiculous.  I would guess that adding a bit of sesame oil at the end would give you enough flavor to satisfy the taste buds!

ASIAN STYLE COUNTRY RIBS
Ingredients

1/4 cup lightly packed brown sugar
1 cup soy sauce
1/4 cup sesame oil
2 tablespoons olive oil
2 tablespoons rice vinegar
2 tablespoons lime juice
2 tablespoons minced garlic
2 tablespoons minced fresh ginger
1 teaspoon Sriracha hot pepper sauce (I must say, I love anything that calls for the rooster sauce!)
12 boneless country-style pork ribs

Directions:

1.Stir together the brown sugar, soy sauce, sesame oil, olive oil, rice vinegar, lime juice, garlic, ginger, and Sriracha in the crock of a slow cooker. Add the ribs; cover and refrigerate. Allow ribs to marinate in the refrigerator for 8 hours or overnight.

2.Before cooking, drain marinade and discard. Cook on Low for 9 hours. Drain cooked meat and shred, using 2 forks.  Serve with hot rice or shredded cabbage for a crunch (yes, this sounds crazy but I like serving it with Asian meat dishes--it doesn't add any flavor but rather texture).